
The first time I watched Brenda Gantt make biscuits on Facebook Live, I almost laughed -no measurements, no fancy equipment, just flour, grease, and buttermilk. Then I made them myself, and I stopped laughing completely. These biscuits are something else.
Brenda Gantt’s biscuit recipe produces a biscuit that is golden on the outside, cloud-soft on the inside, and carries that unmistakable tangy, buttery flavor that store-bought biscuits have been trying to fake for decades. Whether you are a seasoned Southern cook or a complete beginner, this recipe meets you where you are.
Note: This recipe works only with self-rising flour. Brenda herself is very firm on this point -and after one batch, you will understand exactly why.
What Is This Biscuit and Why Do Fans Love Brenda Gantt’s Version?
Brenda Gantt’s biscuits are Southern drop-and-cut biscuits -a style rooted in Appalachian and Deep South home cooking that prioritizes tenderness over precision. Unlike laminated biscuits (the kind you fold repeatedly to create defined flaky layers), these are mixed quickly, handled minimally, and baked hot. The result is a biscuit that is rustic, thick, and pillowy rather than tall and architectural.
What fans love most is the realness of this recipe. Brenda does not use a stand mixer, she does not chill her butter, and she does not obsess over equal-sized rounds. The biscuits come out golden, tender, and slightly dense in the best possible way -the kind that absorb gravy, honey, or butter without falling apart.
Compared to canned biscuits, there is simply no contest. These are richer, softer, and carry the faint sour note that only real buttermilk delivers. That combination is why millions of people keep coming back to this recipe.
The Southern History Behind Old-Fashioned Biscuits Like Brenda Gantt’s
The biscuit has been a centerpiece of Southern cooking for well over 150 years. Before commercially milled self-rising flour existed, Southern cooks made biscuits by combining soft winter wheat flour with lard and buttermilk -the same fundamental combination Brenda Gantt still uses today.

Lard was the original fat of choice in the rural South, and many older Southern bakers swear it still produces the best texture. As Crisco shortening became widely available in the early 20th century, it gradually replaced lard in most home kitchens as the practical, shelf-stable option. Brenda’s recipe sits squarely in that post-lard, shortening-forward tradition.
What distinguishes Brenda Gantt’s approach from modern Southern biscuit recipes is the absence of adaptation. There is no added sugar, no cold butter trick borrowed from French baking, no rest period. This is the recipe that grandmothers made on weekday mornings, working fast because they had a household to feed. Brenda’s viral fame is largely built on the power of that uncompromising authenticity.
Key Ingredients That Give Brenda Gantt Biscuits Their Signature Flavor
Only three ingredients go into this recipe, and every single one carries significant weight.
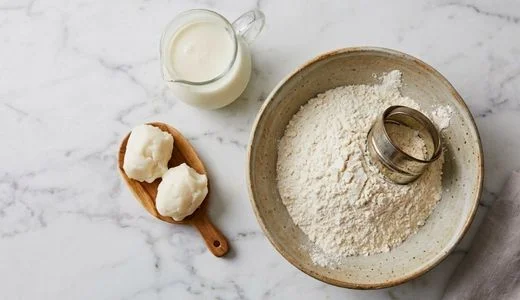
Self-Rising Flour is the non-negotiable foundation. Self-rising flour already contains baking powder and salt in measured proportions, which means the leavening is built in and consistent. Brenda is explicit: do not substitute all-purpose flour. The chemistry simply will not be the same, and your biscuits will be flat and dense.
Shortening (Grease) is what gives these biscuits their tender, melt-in-your-mouth interior. Brenda measures it the old-fashioned way -two portions roughly the size of a chicken egg. The fat coats the flour proteins and prevents gluten from developing too aggressively, which is exactly what keeps the crumb soft rather than chewy. Lard can be used as a direct substitute and will add a slightly richer, more savory flavor.
Buttermilk is the soul of the recipe. Its acidity reacts with the leavening agents in the self-rising flour to create lift, and its fat content adds both richness and that distinctive tangy flavor. Do not substitute regular milk -it will produce a noticeably flatter, blander biscuit. If you are in a pinch, add one tablespoon of white vinegar or lemon juice to one cup of whole milk and let it sit for five minutes to create a quick buttermilk substitute.
Brenda Gantt Biscuit Recipe -Full Ingredient List
| Ingredient | Amount | Notes |
|---|---|---|
| Self-rising flour | 2–3 cups (plus extra for dusting) | Do not substitute all-purpose flour |
| Shortening or lard | 2 chicken-egg-sized portions (~¼ cup) | Crisco or lard both work; avoid butter-flavored shortening |
| Buttermilk | 1 to 1½ cups | Full-fat buttermilk preferred; see substitution note above |
Substitution Notes:
- Shortening → Lard: A 1:1 swap. Lard produces a slightly richer, more traditional Southern flavor.
- Buttermilk → DIY version: 1 cup whole milk + 1 tablespoon white vinegar or lemon juice, rested 5 minutes.
- Self-rising flour → DIY version (last resort only): 1 cup all-purpose flour + 1½ teaspoons baking powder + ¼ teaspoon salt. This is an approximation and results may vary.
Tools You Need to Make Brenda Gantt Biscuits at Home
No specialized equipment is required, which is part of this recipe’s charm. Here is what you need:
- Large mixing bowl -wide enough to create a well in the flour and mix without spilling
- Your hands -the only mixing tool Brenda uses, and the best one for not overworking the dough
- Biscuit cutter or clean tin can -a 2½-inch round cutter is standard; a wide-mouth mason jar lid also works
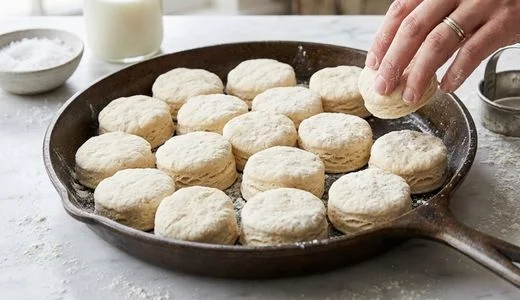
- Cast iron skillet or greased baking pan -Brenda strongly recommends a black iron skillet for even heat and a crispier bottom crust
- Pastry brush (optional) -for brushing melted butter on top after baking
- Oven thermometer (recommended) -to confirm your oven actually reaches 500°F
Prep Time: 10 minutes
Cook Time: 8–12 minutes
Total Time: ~20 minutes
Yield: Approximately 10–14 biscuits depending on cutter size
Step-by-Step Instructions for Brenda Gantt’s Biscuit Recipe
Step 1- Build Your Well
Pour your self-rising flour into a large mixing bowl. Push the flour toward the sides to create a well (a hole) in the center. Drop both egg-sized portions of shortening directly into the well.
Step 2 -Add the Buttermilk
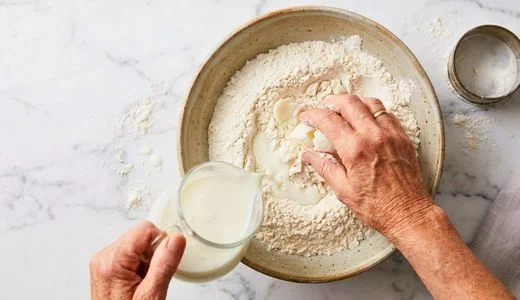
Pour approximately 1 to 1½ cups of buttermilk into the well over the shortening. Start with 1 cup -you can always add more if the dough feels too dry.
Step 3 -Mix With Your Fingers
Use your fingers to work the ingredients together inside the well first. Work quickly and pull in flour from the sides gradually. Keep your movements shallow -do not drag flour in from the very bottom or outer edges aggressively. Mix only until the dough just comes together. It will look shaggy and rough. That is correct. Stop here.
Step 4 -Turn Out the Dough
Clean your hands and dust the top of the dough lightly with flour. Sprinkle flour onto a clean work surface. Transfer the dough onto the floured surface.
Step 5 -Pat and Shape
Gently press the dough down two or three times. Pat or spread it out until it is approximately ½ inch thick. Do not roll with a rolling pin -pressing by hand keeps the dough lighter.
Step 6 -Cut the Biscuits
Dip your biscuit cutter in flour before each cut so it does not drag or stick. Press straight down -do not twist- and cut as many rounds as possible. Place each biscuit onto a greased cast iron skillet or baking pan, sides touching. Roll remaining scraps into a ball, press flat, and add to the pan.
Step 7- Bake at 500°F
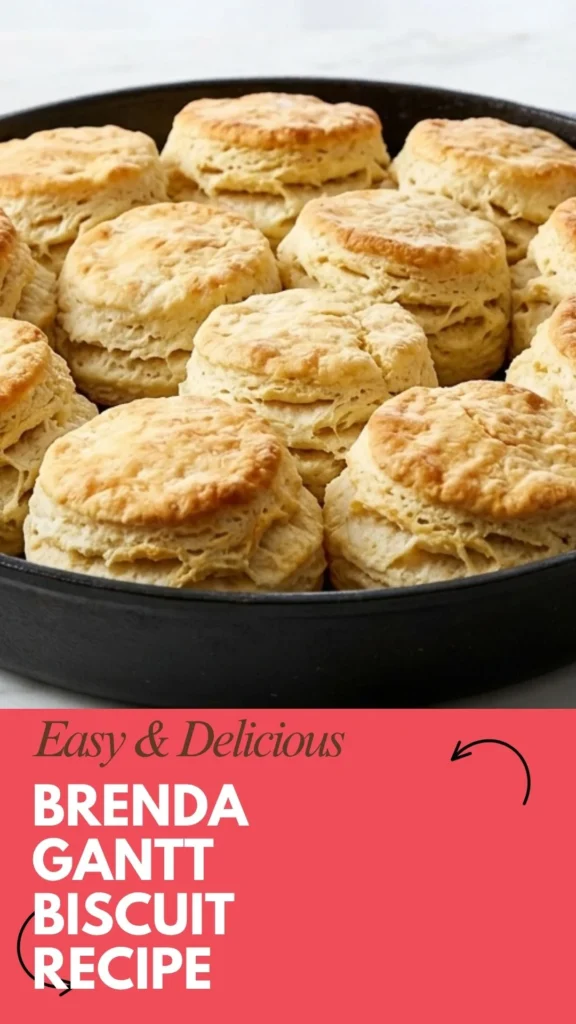
Place the pan into a fully preheated oven at 500°F. Bake for 8 to 12 minutes. Check at 8 minutes -smaller, thinner biscuits finish faster. Pull them when the tops are deep golden brown. Do not bake at a lower temperature; the high heat is what creates the crust and lift simultaneously.
Step 8 -Serve Immediately
Serve hot from the oven. A brush of melted butter on top the moment they come out is optional but highly recommended.
Pro Tips for Getting Brenda Gantt Biscuits Just Right
Getting this recipe right comes down to restraint and heat. Here are the most important things to keep in mind:
1. Do not overwork the dough
This is the single most common mistake home bakers make with biscuits. As soon as the dough comes together, stop mixing. Overworking develops gluten, which turns a tender biscuit into a tough one. Shaggy and rough is the goal.
2. Use full-fat buttermilk
Low-fat buttermilk will work in a pinch, but full-fat produces a noticeably richer biscuit. The fat content matters for both flavor and texture.
3. Make sure your oven is fully preheated to 500°F
Many home ovens take 20 to 25 minutes to reach this temperature properly. If you put the biscuits in too early, they will spread rather than rise, and they will dry out rather than steam. An oven thermometer is the most reliable way to verify this.
4. Do not twist the cutter
Pressing straight down and lifting straight up creates a clean edge that allows the biscuit to rise evenly. Twisting seals the edges and limits lift.
5. Biscuits touching in the pan is intentional
Placing them close together means they support each other and rise upward rather than spreading outward.
6. Adjust buttermilk by feel
Humidity, flour brand, and temperature all affect how much liquid the dough needs. Add buttermilk gradually and stop when the dough is soft but not sticky.
7. Work quickly and confidently
Cold hands and warm kitchens are not ideal for biscuit dough. The faster you work, the better.
Easy Variations to Customize This Brenda Gantt Biscuit Recipe
Once you have the base recipe down, it is easy to adapt these biscuits in several directions:
1. Cheddar and Chive Biscuits: Fold in ½ cup of sharp shredded cheddar and 2 tablespoons of fresh chopped chives after the dough comes together. These pair perfectly with soups and pulled pork.
2. Honey Butter Biscuits: Brush the tops with a mixture of equal parts melted butter and honey the moment they come out of the oven.
3. Black Pepper Biscuits: Add 1 teaspoon of coarsely cracked black pepper to the flour before mixing. This version is excellent alongside country ham.
4. Lard Version: Swap the shortening for lard at a 1:1 ratio for a deeper, more old-fashioned Southern flavor -exactly what Brenda’s grandmother would have used.
5. Mini Biscuits: Use a smaller cutter to make appetizer-sized biscuits. Reduce bake time to 6 to 8 minutes and watch closely.
Best Ways to Serve Brenda Gantt Biscuits in Your Meals
These biscuits are versatile enough to anchor a meal or complement one, and the serving possibilities are genuinely endless.
1. Classic Southern Breakfast: Split a hot biscuit and fill it with a fried egg, crispy bacon or sausage patty, and a slice of cheese. This is the Southern biscuit sandwich at its most iconic -hearty, satisfying, and infinitely better than any fast food version.
2. With Sausage Gravy: Spoon thick, creamy white sausage gravy over split biscuits for a full Southern biscuit and gravy plate. The slightly tangy flavor of these biscuits cuts through the richness of the gravy beautifully.
3. Honey and Butter: Simply split a fresh biscuit, drop a pat of cold butter inside, and drizzle with good honey. This is the purist’s approach and still one of the best ways to eat them.
4. With Fried Chicken: Serve these biscuits alongside Southern fried chicken for a complete comfort food meal. The biscuits are sturdy enough to hold up as a sandwich vessel as well.
5. Alongside Soups and Stews: These biscuits are exceptional dipped into vegetable beef soup, chicken and dumplings, or a thick potato chowder. They absorb liquid without dissolving, making them ideal for dunking.
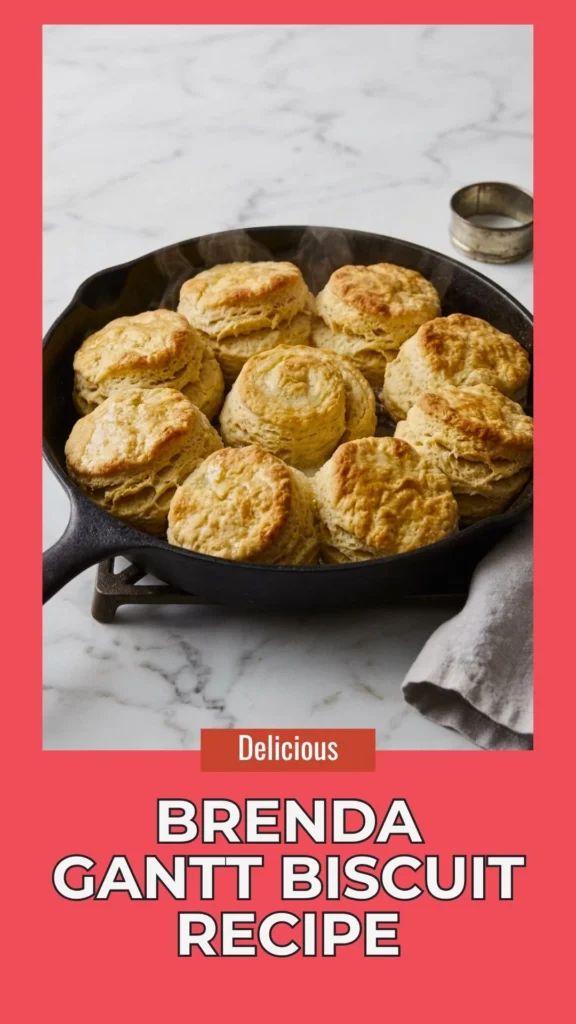
6. With Jam or Preserves: Brenda herself often serves her biscuits with homemade preserves. Strawberry jam, fig preserves, or peach butter are all traditional Southern pairings that complement the buttermilk tang perfectly.
7. As a Dinner Side: Place a basket of these biscuits on the table alongside pot roast, collard greens, or baked chicken. They play the same role dinner rolls do in other culinary traditions -they are the vehicle for every last bit of sauce or broth left on the plate.
How to Store Brenda Gantt Biscuits and Keep Them Fresh
Room Temperature: Store leftover biscuits in an airtight container or zip-lock bag at room temperature for up to 2 days. Avoid the refrigerator -it dries them out quickly.
Freezer: These biscuits freeze exceptionally well. Place them in a single layer on a baking sheet to freeze solid, then transfer to a freezer-safe bag. They keep for up to 3 months.
Reheating: For the best results, wrap biscuits in foil and warm them in a 350°F oven for 8 to 10 minutes. This revives the texture without drying them out. The microwave works in a pinch -20 to 30 seconds wrapped in a damp paper towel -but the crust will soften. For frozen biscuits, bake straight from the freezer at 350°F for 15 to 18 minutes.
Nutrition Facts and Dietary Notes for This Biscuit Recipe
Estimated per biscuit (based on a yield of 12 biscuits):
| Nutrient | Approximate Amount |
|---|---|
| Calories | 180–220 kcal |
| Carbohydrates | 26–28g |
| Fat | 7–9g |
| Protein | 3–4g |
| Sodium | 350–400mg |
Dietary Notes:
- Gluten-Free: Substitute a 1:1 gluten-free self-rising flour blend. Results will vary by brand -Bob’s Red Mill 1-to-1 performs reliably.
- Dairy-Free: Replace buttermilk with unsweetened oat milk or soy milk plus one tablespoon of apple cider vinegar. The texture will be slightly less rich.
- Lower Fat: Replace shortening with cold unsalted butter (2:3 ratio by volume). This changes the flavor profile but reduces saturated fat.
These biscuits provide quick energy from complex carbohydrates and are a satisfying source of comfort. They are best enjoyed as an occasional indulgence as part of a balanced diet.
Brenda Gantt’s biscuit recipe is proof that the simplest recipes are often the hardest to improve. Three ingredients, two hands, one very hot oven -and the result is a biscuit that tastes exactly like something your grandmother would have pulled from a cast iron skillet on a Sunday morning.
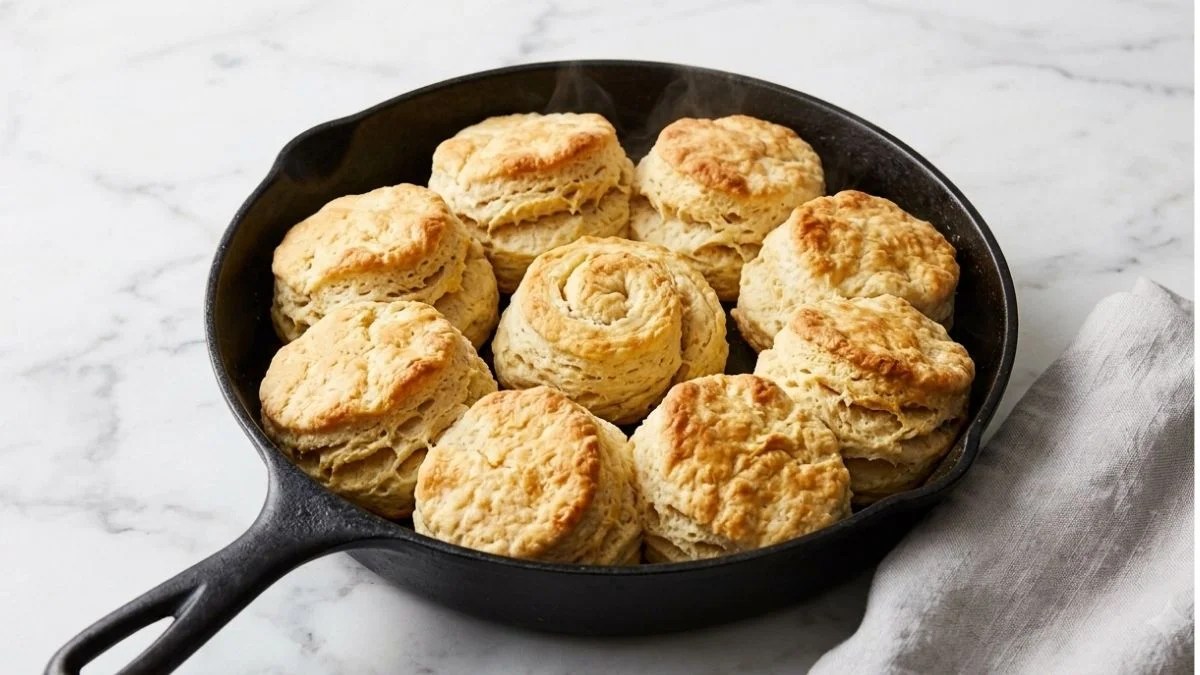
Brenda Gantt Biscuit Recipe
Ingredients
Method
- Pour your self-rising flour into a large mixing bowl. Push the flour toward the sides to create a well (a hole) in the center. Drop both egg-sized portions of shortening directly into the well.
- Pour approximately 1 to 1½ cups of buttermilk into the well over the shortening. Start with 1 cup -you can always add more if the dough feels too dry.
- Use your fingers to work the ingredients together inside the well first. Work quickly and pull in flour from the sides gradually. Keep your movements shallow -do not drag flour in from the very bottom or outer edges aggressively. Mix only until the dough just comes together. It will look shaggy and rough. That is correct. Stop here.
- Clean your hands and dust the top of the dough lightly with flour. Sprinkle flour onto a clean work surface. Transfer the dough onto the floured surface.
- Gently press the dough down two or three times. Pat or spread it out until it is approximately ½ inch thick. Do not roll with a rolling pin -pressing by hand keeps the dough lighter.
- Dip your biscuit cutter in flour before each cut so it does not drag or stick. Press straight down -do not twist- and cut as many rounds as possible. Place each biscuit onto a greased cast iron skillet or baking pan, sides touching. Roll remaining scraps into a ball, press flat, and add to the pan.
- Place the pan into a fully preheated oven at 500°F. Bake for 8 to 12 minutes. Check at 8 minutes -smaller, thinner biscuits finish faster. Pull them when the tops are deep golden brown. Do not bake at a lower temperature; the high heat is what creates the crust and lift simultaneously.
- Serve hot from the oven. A brush of melted butter on top the moment they come out is optional but highly recommended.
Video
Notes
If you try this recipe, I would love to hear how it went. Did you add cheddar? Serve them with gravy? Make a double batch and freeze half? Drop your experience in the comments below -every biscuit story is worth sharing.
Looking for more Southern comfort recipes?
→ Brenda Gantt Cornbread Recipe
→ Brenda Gantt Beef Stew Recipe
→ Brenda Gantt White Lily Buttermilk Biscuits Recipe
We’d love to hear what you think of this recipe! Give it a try and let us know how it turned out by leaving a comment below. Don’t forget to follow us on Pinterest, Facebook and YouTube for more delicious recipes, cooking inspiration, and kitchen tips. Your feedback and support help us continue creating content you’ll love!
looks yummy and simple
Thanks