
If you’ve spent any time watching Brenda Gantt’s cooking videos, you’ve probably seen her roll dough out paper-thin, tuck in a spoonful of apple filling, and fry up a batch of golden hand pies while talking to the camera like you’re standing right there in her kitchen. That’s exactly where this Brenda Gantt fried apple pies recipe comes from -pieced together from her own videos, where she makes them completely from scratch.
These little pies are crisp outside, soft and sweet inside, and finished with a simple powdered sugar glaze that melts into every corner while they’re still warm. No fancy equipment, no exact science. Just stiff dough, hot oil, and a steady hand.
A quick note: the original videos don’t give exact measurements for the dough, so a few amounts here are reasonable estimates, not precise originals.
What Is This Food and Why Do Fans Love It?
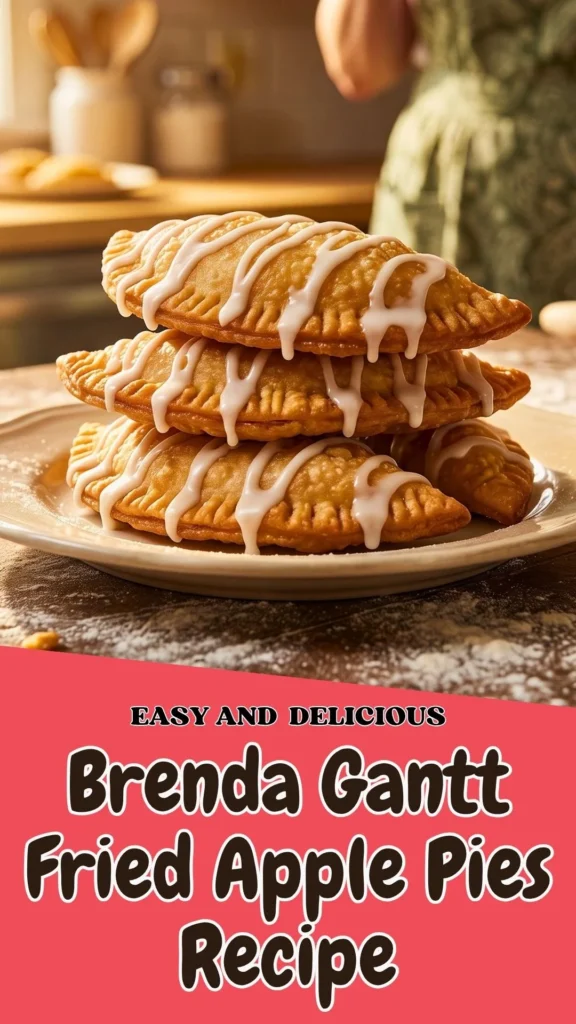
Fried apple pies are small, half-moon hand pies made from a stiff, buttermilk-based dough, filled with sweetened apple filling, and fried until golden in a skillet of hot oil. Once drained, they’re drizzled with a thin powdered sugar glaze while still warm.
They sit in the same family as other handheld fruit pastries, like baked hand pies, empanadas, and even the store-bought toaster pastry, but frying sets them apart. The hot oil gives the crust a shatter-crisp texture that baking can’t replicate, while a short, fast fry time keeps the inside from turning greasy.
Fans love Brenda Gantt’s version specifically because it’s unapologetically old-fashioned: a plain flour-and-buttermilk dough, a filling you can make from canned or homemade apple pie filling, and a glaze mixed by eye rather than a recipe card. It’s the kind of fried apple pie recipe built for a home kitchen, not a bakery, which is exactly its appeal.
The Nostalgic History Behind Brenda Gantt’s Fried Apple Pies
Fried hand pies have deep roots in Southern and Appalachian home cooking, where cooks stretched a little fruit and a lot of dough into a portable, pocket-sized dessert that traveled well in a lunch pail or saddlebag, long before refrigeration made baked pies practical to transport.
Brenda Gantt herself is part of that same tradition. She’s a retired schoolteacher who runs a bed and breakfast in Andalusia, Alabama, and learned to cook from the women in her family before her videos found an audience far beyond her kitchen. A single Facebook video of her cooking turned her into a widely followed home cook, and she went on to publish her first cookbook, full of recipes and stories from her life.
That home-kitchen approach is what separates this fried apple pie recipe from the mass-produced version at a gas station or grocery store: this one still comes from someone’s actual kitchen table.
Key Ingredients That Give Fried Apple Pies Their Signature Flavor
A handful of pantry staples do all the work here.
All-Purpose Flour (White Lily Preferred): A soft Southern flour that keeps the dough tender enough to roll paper-thin without tearing. Any all-purpose flour works, but a soft Southern brand gets you closest to the original texture.
Solid Shortening: Worked into the flour, it’s what makes the dough sturdy enough to fry without falling apart, while still staying flaky once it’s cooked.
Buttermilk: Added gradually until the dough just comes together. It gives the dough a slight tang and enough moisture to hold without turning sticky.
Apple Pie Filling: The star of the show. Canned filling works fine, chopped down so no piece is too large to seal inside the dough.
Peanut Oil or Vegetable Oil: Both appear in different versions of this recipe. Either one fries the pies quickly and cleanly without flavoring the crust.
Powdered Sugar Glaze: Just powdered sugar and a few drops of water, thinned to a drizzle consistency and poured over the warm pies.
Brenda Gantt Fried Apple Pies: Ingredient List
| Ingredient | Quantity | Notes & Substitutions |
|---|---|---|
| All-purpose flour | About 2 cups, plus more for rolling | White Lily is traditional; any soft all-purpose flour works |
| Solid shortening | About the size of a chicken egg | Lard can be substituted for a slightly richer crust |
| Buttermilk | Added gradually, no exact amount given | Add just until the dough holds together; it should stay stiff, not sticky |
| Apple pie filling | About a heaping tablespoon per pie | Chop large apple wedges into smaller pieces so they seal easily |
| Water | A small amount, for sealing edges | Just enough to dampen the edge of the dough |
| Peanut oil or vegetable oil | Enough to fill a skillet partway | Either works; don’t overfill the pan |
| Powdered sugar | As needed for the glaze | – |
| Water (for glaze) | Just a few drops at a time | Add slowly -it’s easy to thin the glaze too much |
Shortcut: Leftover biscuit dough works in place of homemade dough. Knead in extra flour until it’s stiff, then roll it out thin.
Tools You Need to Make Fried Apple Pies at Home
- Large mixing bowl
- Rolling pin
- Floured work surface
- Fork (for crimping edges)
- Large skillet (cast iron works well)
- Slotted spoon or flat spatula (not tongs -they mash the pies)
- Paper towels, for draining
- Small cup, for mixing the glaze
- Pastry brush (optional, for brushing on glaze)
Prep Time: About 30 minutes
Fry Time: 1–2 minutes per side (estimated; the source videos don’t give an exact time)
Oil Temperature: Roughly 350–375°F is a common frying range (estimated -not stated in the original videos)
Total Time: About 45 minutes
Yield: Varies by dough batch; roughly 10–14 small pies from 2 cups of flour
Steps to Make This Fried Apple Pies Recipe
Step 1: Make the Dough
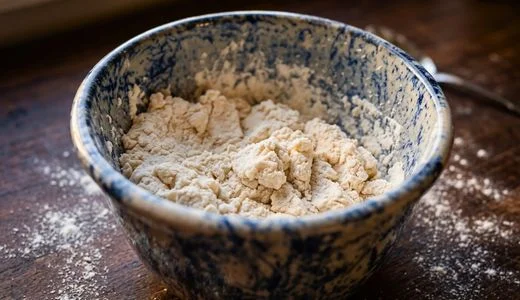
Pour the flour into a bowl, add the shortening and a little buttermilk, and work it together with your hands. Keep adding small splashes of buttermilk until the dough just holds together. It should be noticeably stiffer than a regular biscuit dough -if it’s sticky enough to cling to your work surface, it’s too wet.
Step 2: Shape the Dough
Flour your work surface and your hands well. Pinch off a piece of dough about the size of a golf ball, a little larger if you want a bigger pie.
Step 3: Roll It Out
Lightly flour the dough and roll it out as thin as you can get it -paper-thin is the goal. If it’s rolled too thick, the finished pie will taste more like a fried biscuit than a crisp hand pie. It should lift cleanly off the surface.
Step 4: Fill and Seal
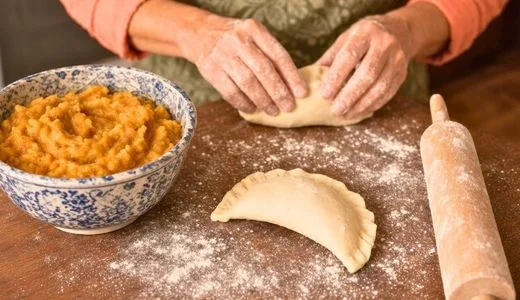
Spoon a heaping tablespoon of apple filling onto one half of the dough circle. Dab a little water around the edge -it acts like glue -then fold the other half over and press the edges together. Skipping the water lets the filling leak out into the hot oil.
Step 5: Trim and Crimp
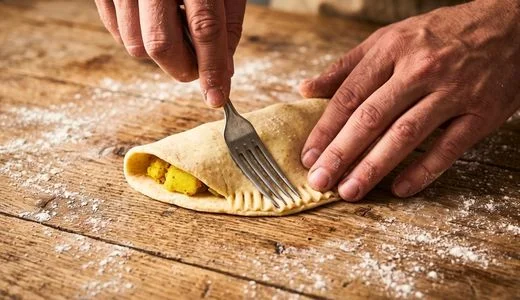
Trim away any excess dough for a neat edge. Dip a fork in flour so it doesn’t stick, then press it around the entire edge to seal and decorate the pie. Patch any holes you find before frying.
Step 6: Heat the Oil
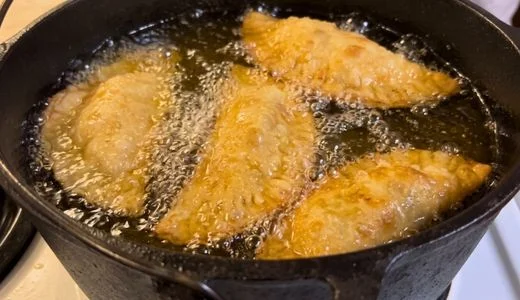
Heat the oil in a skillet, keeping the pan from being too full. Test it by dropping in a small piece of dough -if it sinks and pops right back up, the oil is ready.
Step 7: Fry
Gently lay the pies into the hot oil, about three at a time. Don’t drop them in. They cook fast, so don’t walk away. Flip once and fry until golden brown on both sides.
Step 8: Drain
Lift the pies out with a slotted spoon or flat spatula -tongs will mash them. Drain on paper towels, and start the next batch in the oil right away so it isn’t sitting unused.
Step 9: Glaze
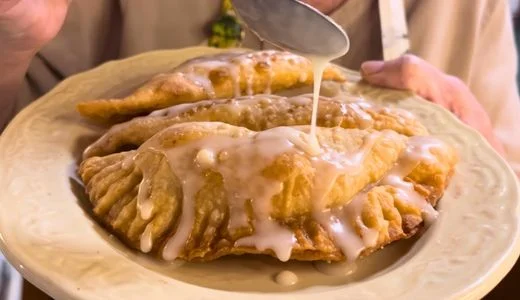
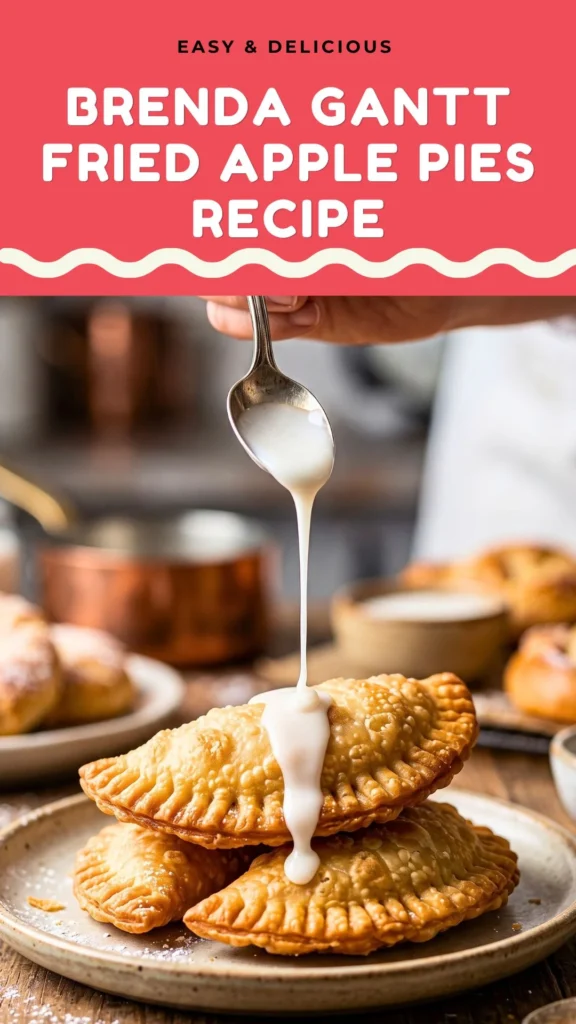
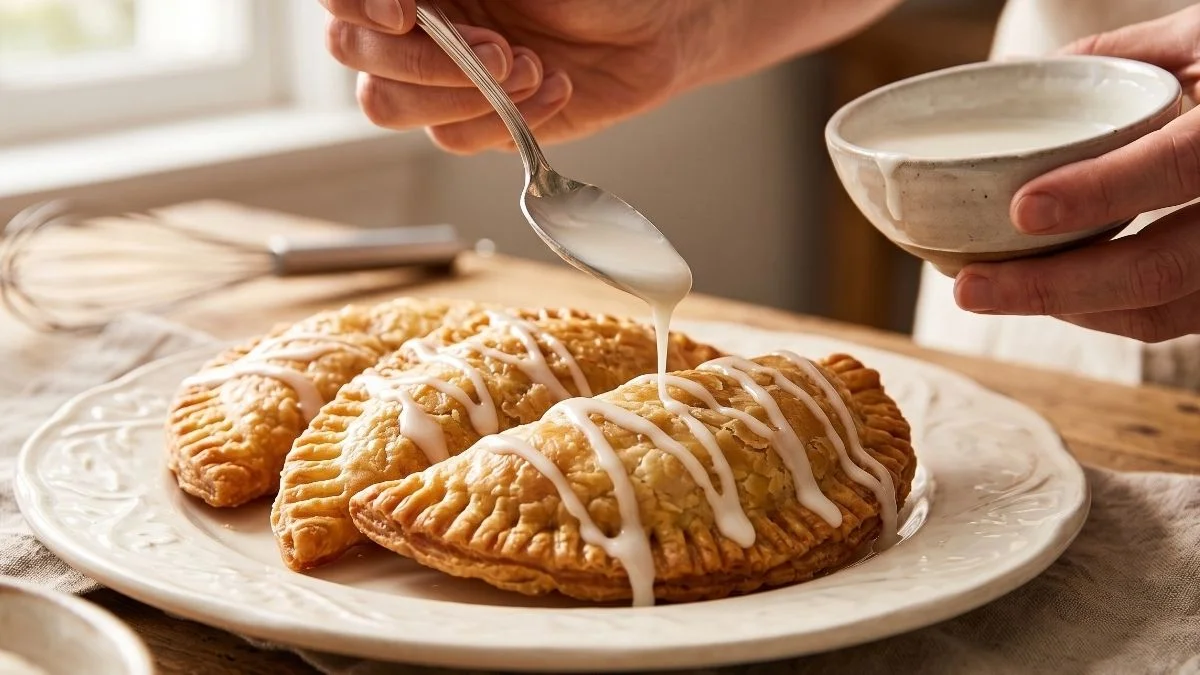
Stir powdered sugar with a small amount of water in a cup, adding water a little at a time until it’s thin enough to drizzle. Pour it over the warm pies so it melts into the corners, or brush it on.
Step 10: Cool
If you’re not serving them right away, lay a paper towel loosely over the top. Don’t tuck it in, or the pies will sweat and go soft.
Pro Tips for Getting the Fried Apple Pies Flavor Just Right
1. Keep the dough stiff, not sticky
This is the single most important detail. A dough that’s too soft will stick to your rolling surface and fall apart in the oil. Add buttermilk gradually, and stop as soon as the dough comes together.
2. Roll it genuinely thin
“Paper-thin” isn’t an exaggeration here. A thick dough fries up tasting like a fried biscuit instead of a crisp hand pie, which misses the point of the whole recipe.
3. Never skip the water seal
A dry edge won’t hold. Without a dab of water working as glue, the filling escapes into the oil during frying, which both wastes filling and makes a mess in the pan.
4. Watch your oil temperature
The dough test, dropping in a small piece and watching it sink and pop back up, is a reliable way to check readiness without a thermometer. Oil that’s too cool lets the pies soak up grease instead of frying quickly.
5. Fry fast, and don’t overcrowd the pan
Frying only a few pies at a time keeps the oil temperature steady and keeps the pies from sticking together.
6. Use a spatula, not tongs
Tongs tend to crush the thin, delicate crust. A slotted spoon or flat spatula lifts the pies cleanly.
7. Glaze while warm
The glaze needs residual heat from the pie to melt and spread evenly into the crimped edges. A cooled pie leaves the glaze sitting on top instead of soaking in.

8. Don’t trap steam while cooling
Covering the pies tightly traps moisture and softens the crisp crust. A loosely draped paper towel is enough.
Easy Variations to Customize This Fried Apple Pies Recipe
Fig Pies: Stew down figs with sugar and use that in place of apple filling. The flavor comes out close to a fig newton.
Savory Pies: Skip the fruit filling entirely and use hamburger meat and cheese, or pizza sauce and cheese, for a savory hand pie.
Biscuit Dough Shortcut: No time to make dough from scratch? Use leftover biscuit dough, kneading in extra flour until it’s stiff enough to roll thin.
Other Fruit Fillings: Any canned or homemade pie filling works in place of apple – cherry, peach, and blueberry are easy swaps.
Reused Frying Oil: The frying oil can be strained and saved for the next batch, which also makes this an economical recipe to repeat.
Best Ways to Serve Brenda Gantt’s Fried Apple Pies in Your Meals
These pies are built for simplicity, and the classic serving style is hard to beat.
With Coffee: The traditional pairing is a warm fried apple pie alongside a good cup of coffee. The glaze’s sweetness and the coffee’s bitterness balance each other well, and it’s an easy breakfast or afternoon treat.
As a Grab-and-Go Snack: Because they’re hand-held and travel well, these pies are a natural lunchbox or road-trip addition. Wrap them individually once fully cooled so the glaze doesn’t smear.
With Ice Cream: Serve a warm pie split open with a scoop of vanilla ice cream melting over the top, much like our Brenda Gantt Peach Cobbler Recipe. The contrast between the crisp, warm crust and the cold ice cream makes for an easy dessert upgrade.
On a Dessert Platter: For a gathering, arrange a batch of pies on a platter with the glaze drizzled generously over the top, alongside other handheld Southern desserts like tea cakes or pecan bars.
With a Scoop of Cinnamon Whipped Cream: Whip cream with a touch of cinnamon and powdered sugar, and serve it alongside the pies for dipping.
As a Holiday Dessert Table Addition: These travel and hold up well at room temperature for a few hours, which makes them a practical addition to a holiday dessert spread alongside heavier baked pies.
Savory Variation as a Meal: If you’ve made the hamburger-and-cheese or pizza-sauce variation, serve them as a handheld lunch or dinner alongside a simple green salad.
However you serve them, these pies are best eaten the same day they’re fried. The crisp crust and glaze are at their peak within a few hours of frying, while the dough is still fresh.
How to Store and Reheat Fried Apple Pies
Room Temperature: If serving within a few hours, keep the pies loosely covered with a paper towel. Don’t wrap them tightly, or trapped steam will soften the crust.
Refrigerator: Store fully cooled pies in an airtight container for up to 3 days. Expect some softening of the crust over time, since frying doesn’t keep as well as baking.
Freezer: Freeze unglazed pies in a single layer, then transfer to a freezer bag for up to 2 months. Glaze after reheating, not before freezing.
Reheating: Warm pies in a 350°F oven for about 8–10 minutes to re-crisp the crust. Avoid the microwave, which will make the crust soft and chewy instead of crisp.
Nutrition Facts and Dietary Notes for Fried Apple Pies
Estimate per pie, based on a standard golf-ball-sized portion:
| Calories | ~180 kcal |
| Protein | ~2g |
| Fat | ~9g |
| Carbohydrates | ~22g |
| Sugar | ~10g |
Gluten-Free: Not as written, since the dough relies on wheat flour. A 1:1 gluten-free flour blend can be tested as a substitute, though texture may vary.
Vegan: Not as written, due to the buttermilk and shortening with dairy content; dairy-free buttermilk and vegetable shortening could be substituted.
Dietary Note: As a fried, sugar-glazed dessert, this is a treat food rather than an everyday item. Portion size matters more than any single ingredient here.
Nutritional values are estimates and will vary by pie size and frying time.
Brenda Gantt Fried Apple Pies Recipe
Ingredients
Method
- Pour the flour into a bowl, add the shortening and a little buttermilk, and work it together with your hands. Keep adding small splashes of buttermilk until the dough just holds together. It should be noticeably stiffer than a regular biscuit dough -if it’s sticky enough to cling to your work surface, it’s too wet.
- Flour your work surface and your hands well. Pinch off a piece of dough about the size of a golf ball, a little larger if you want a bigger pie.
- Lightly flour the dough and roll it out as thin as you can get it -paper-thin is the goal. If it’s rolled too thick, the finished pie will taste more like a fried biscuit than a crisp hand pie. It should lift cleanly off the surface.
- Spoon a heaping tablespoon of apple filling onto one half of the dough circle. Dab a little water around the edge -it acts like glue -then fold the other half over and press the edges together. Skipping the water lets the filling leak out into the hot oil.
- Trim away any excess dough for a neat edge. Dip a fork in flour so it doesn’t stick, then press it around the entire edge to seal and decorate the pie. Patch any holes you find before frying.
- Heat the oil in a skillet, keeping the pan from being too full. Test it by dropping in a small piece of dough -if it sinks and pops right back up, the oil is ready.
- Gently lay the pies into the hot oil, about three at a time. Don’t drop them in. They cook fast, so don’t walk away. Flip once and fry until golden brown on both sides.
- Lift the pies out with a slotted spoon or flat spatula -tongs will mash them. Drain on paper towels, and start the next batch in the oil right away so it isn’t sitting unused.
- Stir powdered sugar with a small amount of water in a cup, adding water a little at a time until it’s thin enough to drizzle. Pour it over the warm pies so it melts into the corners, or brush it on.
- If you’re not serving them right away, lay a paper towel loosely over the top. Don’t tuck it in, or the pies will sweat and go soft.
Video
Notes
This Brenda Gantt fried apple pies recipe captures everything good about old-fashioned Southern hand pies: a stiff, simple dough, a quick hot-oil fry, and a glaze that melts right into the crimped edges. It doesn’t take fancy ingredients or exact measurements, just the three things that matter most: thin dough, a tight seal, and hot oil.
Give them a try and let me know how your batch turns out in the comments below. Did you stick with apple, or try the fig or savory version? I’d love to hear about it. For more old-fashioned Southern recipes like this one, browse the rest of the blog.
We’d love to hear what you think of this recipe! Give it a try and let us know how it turned out by leaving a comment below. Don’t forget to follow us on Pinterest, Facebook and YouTube for more delicious recipes, cooking inspiration, and kitchen tips. Your feedback and support help us continue creating content you’ll love!